Three tier and two tier application architecture


A three-tier architecture is a software architecture pattern where the application is broken down into three logical tiers: the presentation layer, the business logic layer and the data storage layer. This architecture is used in a client-server application such as a web application that has the frontend, the backend and the database. Each of these layers or tiers does a specific task and can be managed independently of each other. This a shift from the monolithic way of building an application where the frontend, the backend and the database are both sitting in one place.

- Setup the Virtual Private Cloud (VPC): VPC stands for Virtual Private Cloud (VPC). It is a virtual network where you create and manage your AWS resource in a more secure and scalable manner. Go to the VPC section of the AWS services, and click on the Create VPC button.
Give your VPC a name and a CIDR block of 10.0.0.0/16
NAT Gateway
- In order for our instances in the app layer private subnet to be able to access the internet they will need to go through a NAT Gateway. For high availability, you’ll deploy one NAT gateway in each of your public subnets. Navigate to NAT Gateways on the left side of the current dashboard and click Create NAT Gateway.
We will need six subnets across two availability zones. That means that three subnets will be in one availability zone, and three subnets will be in another zone. Each subnet in one availability zone will correspond to one layer of our three tier architecture. Create each of the 6 subnets by specifying the VPC we created in part 1 and then choose a name, availability zone, and appropriate CIDR range for each of the subnets.

- In order for our instances in the app layer private subnet to be able to access the internet they will need to go through a NAT Gateway. For high availability, you’ll deploy one NAT gateway in each of your public subnets. Navigate to NAT Gateways on the left side of the current dashboard and click Create NAT Gateway.

for Public subnet create route table and make sure to give internet access as well as subnet association
for private subnet dont give internet.

Security Group
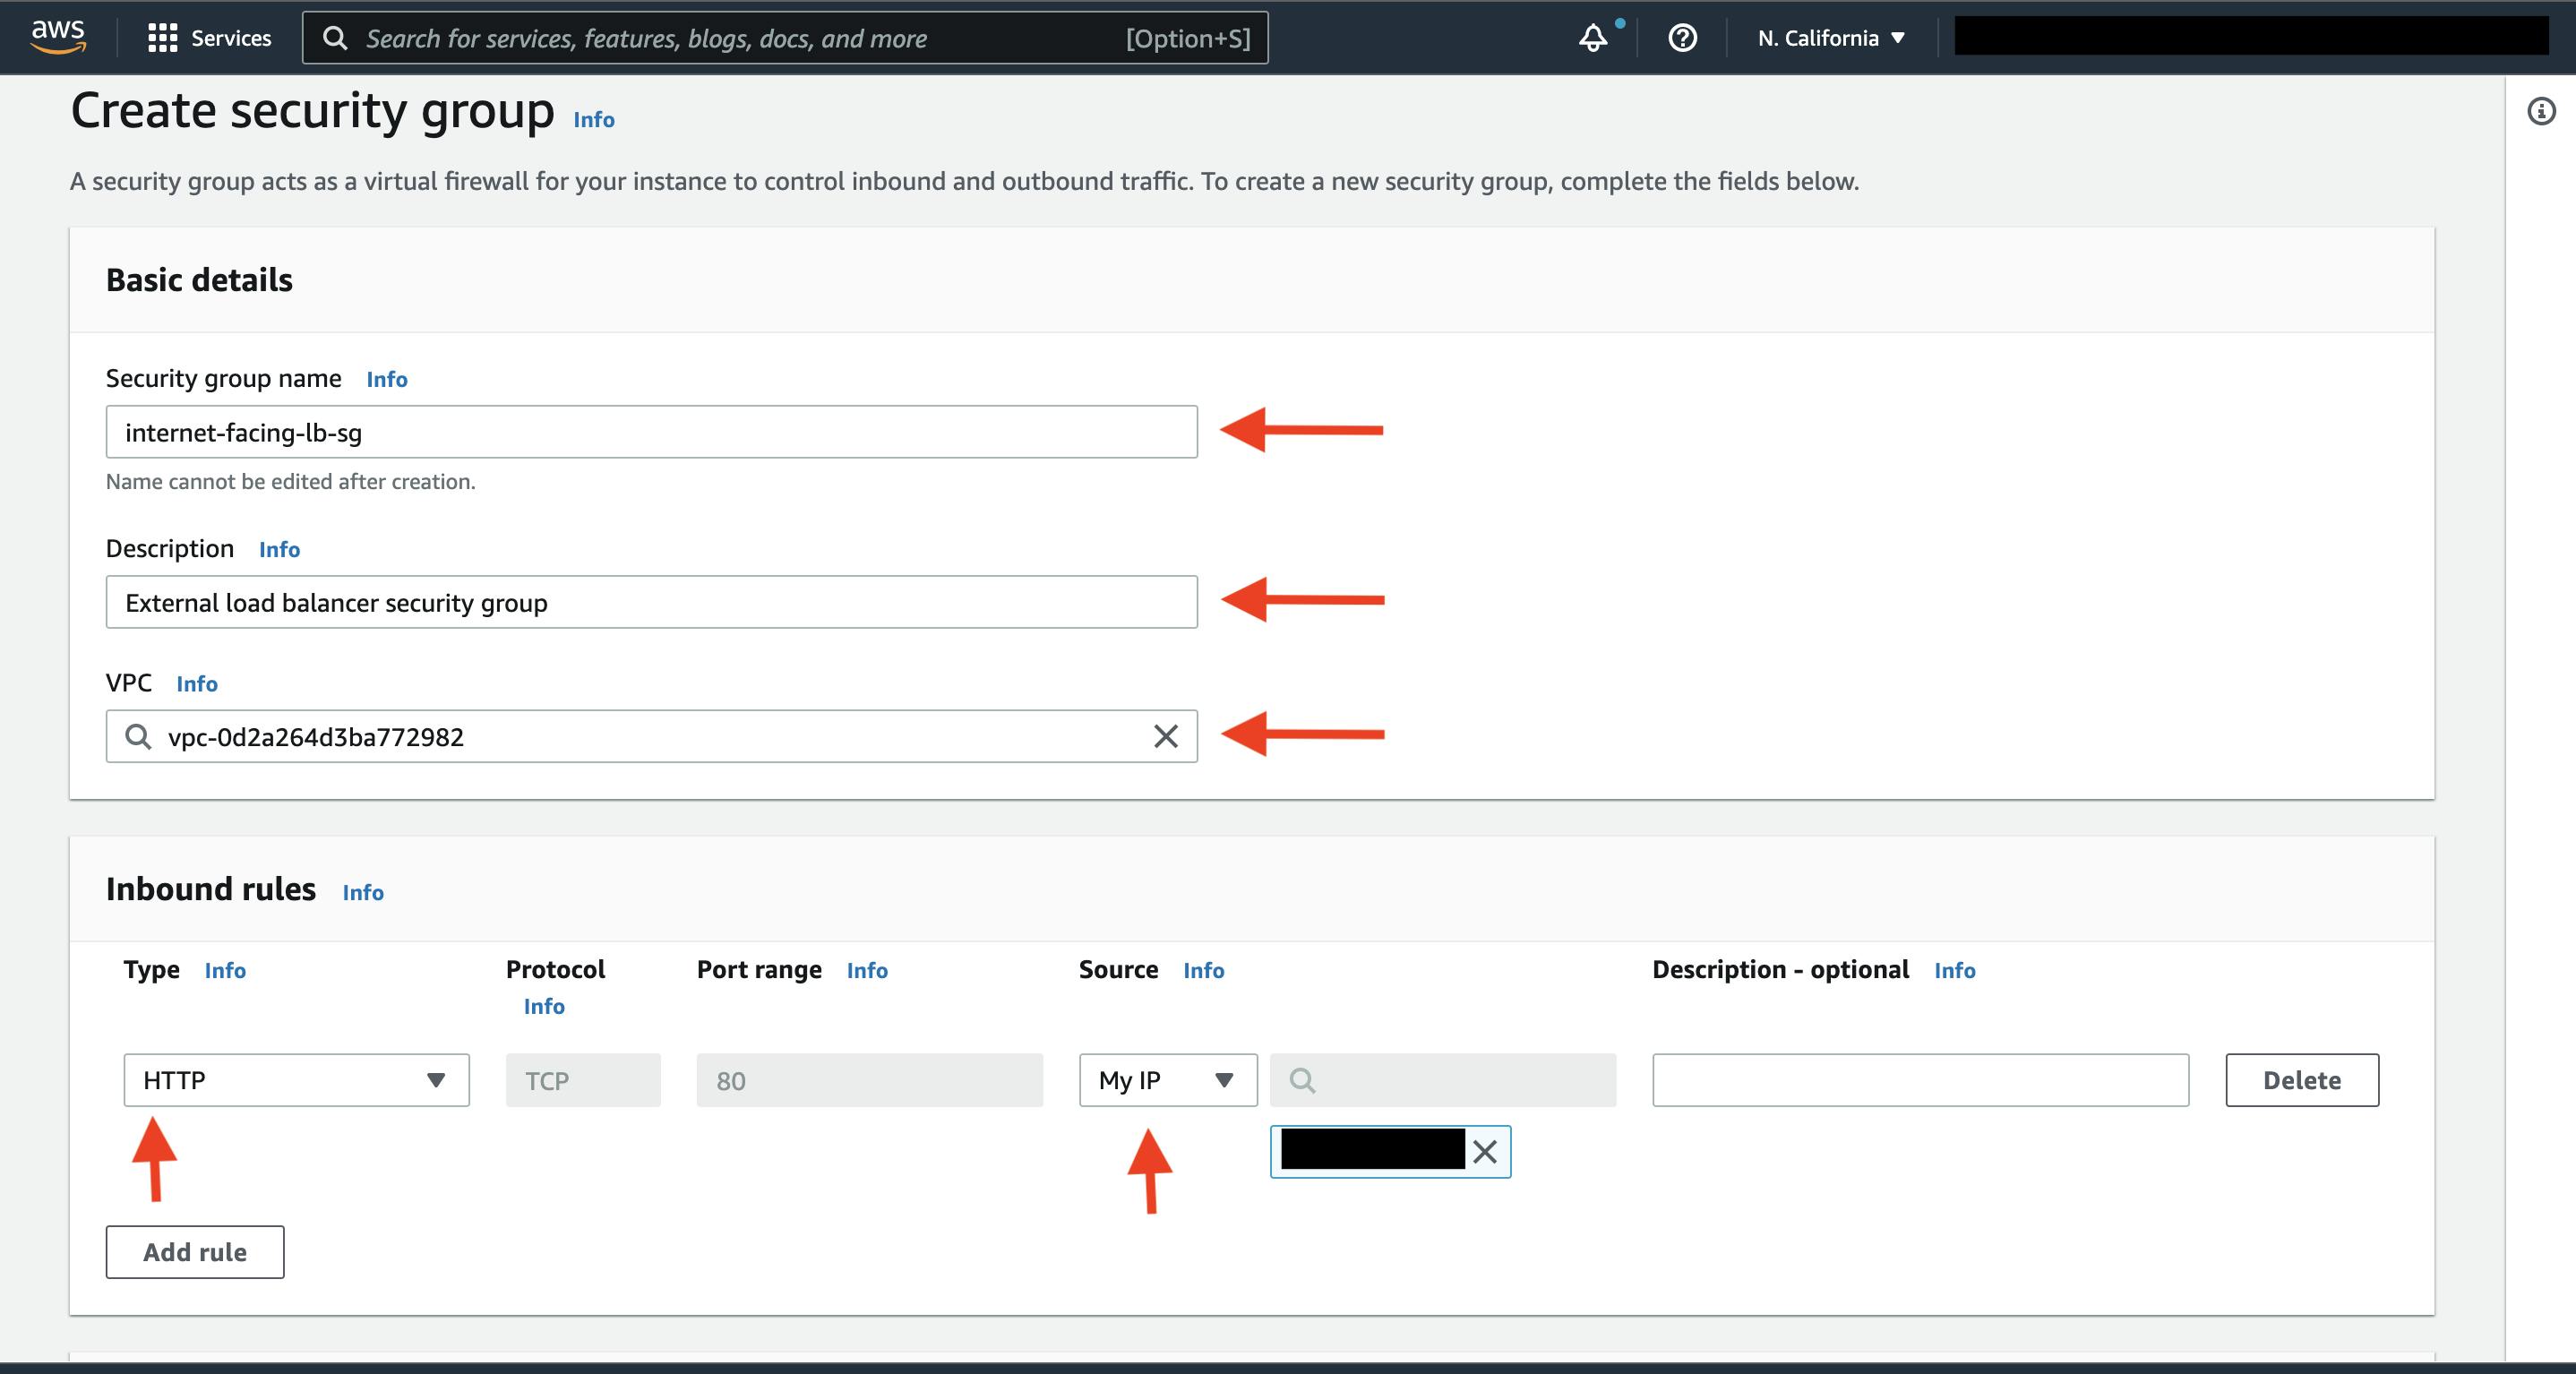
The first security group you’ll create is for the public, internet facing load balancer. After typing a name and description, add an inbound rule to allow HTTP type traffic for your IP.
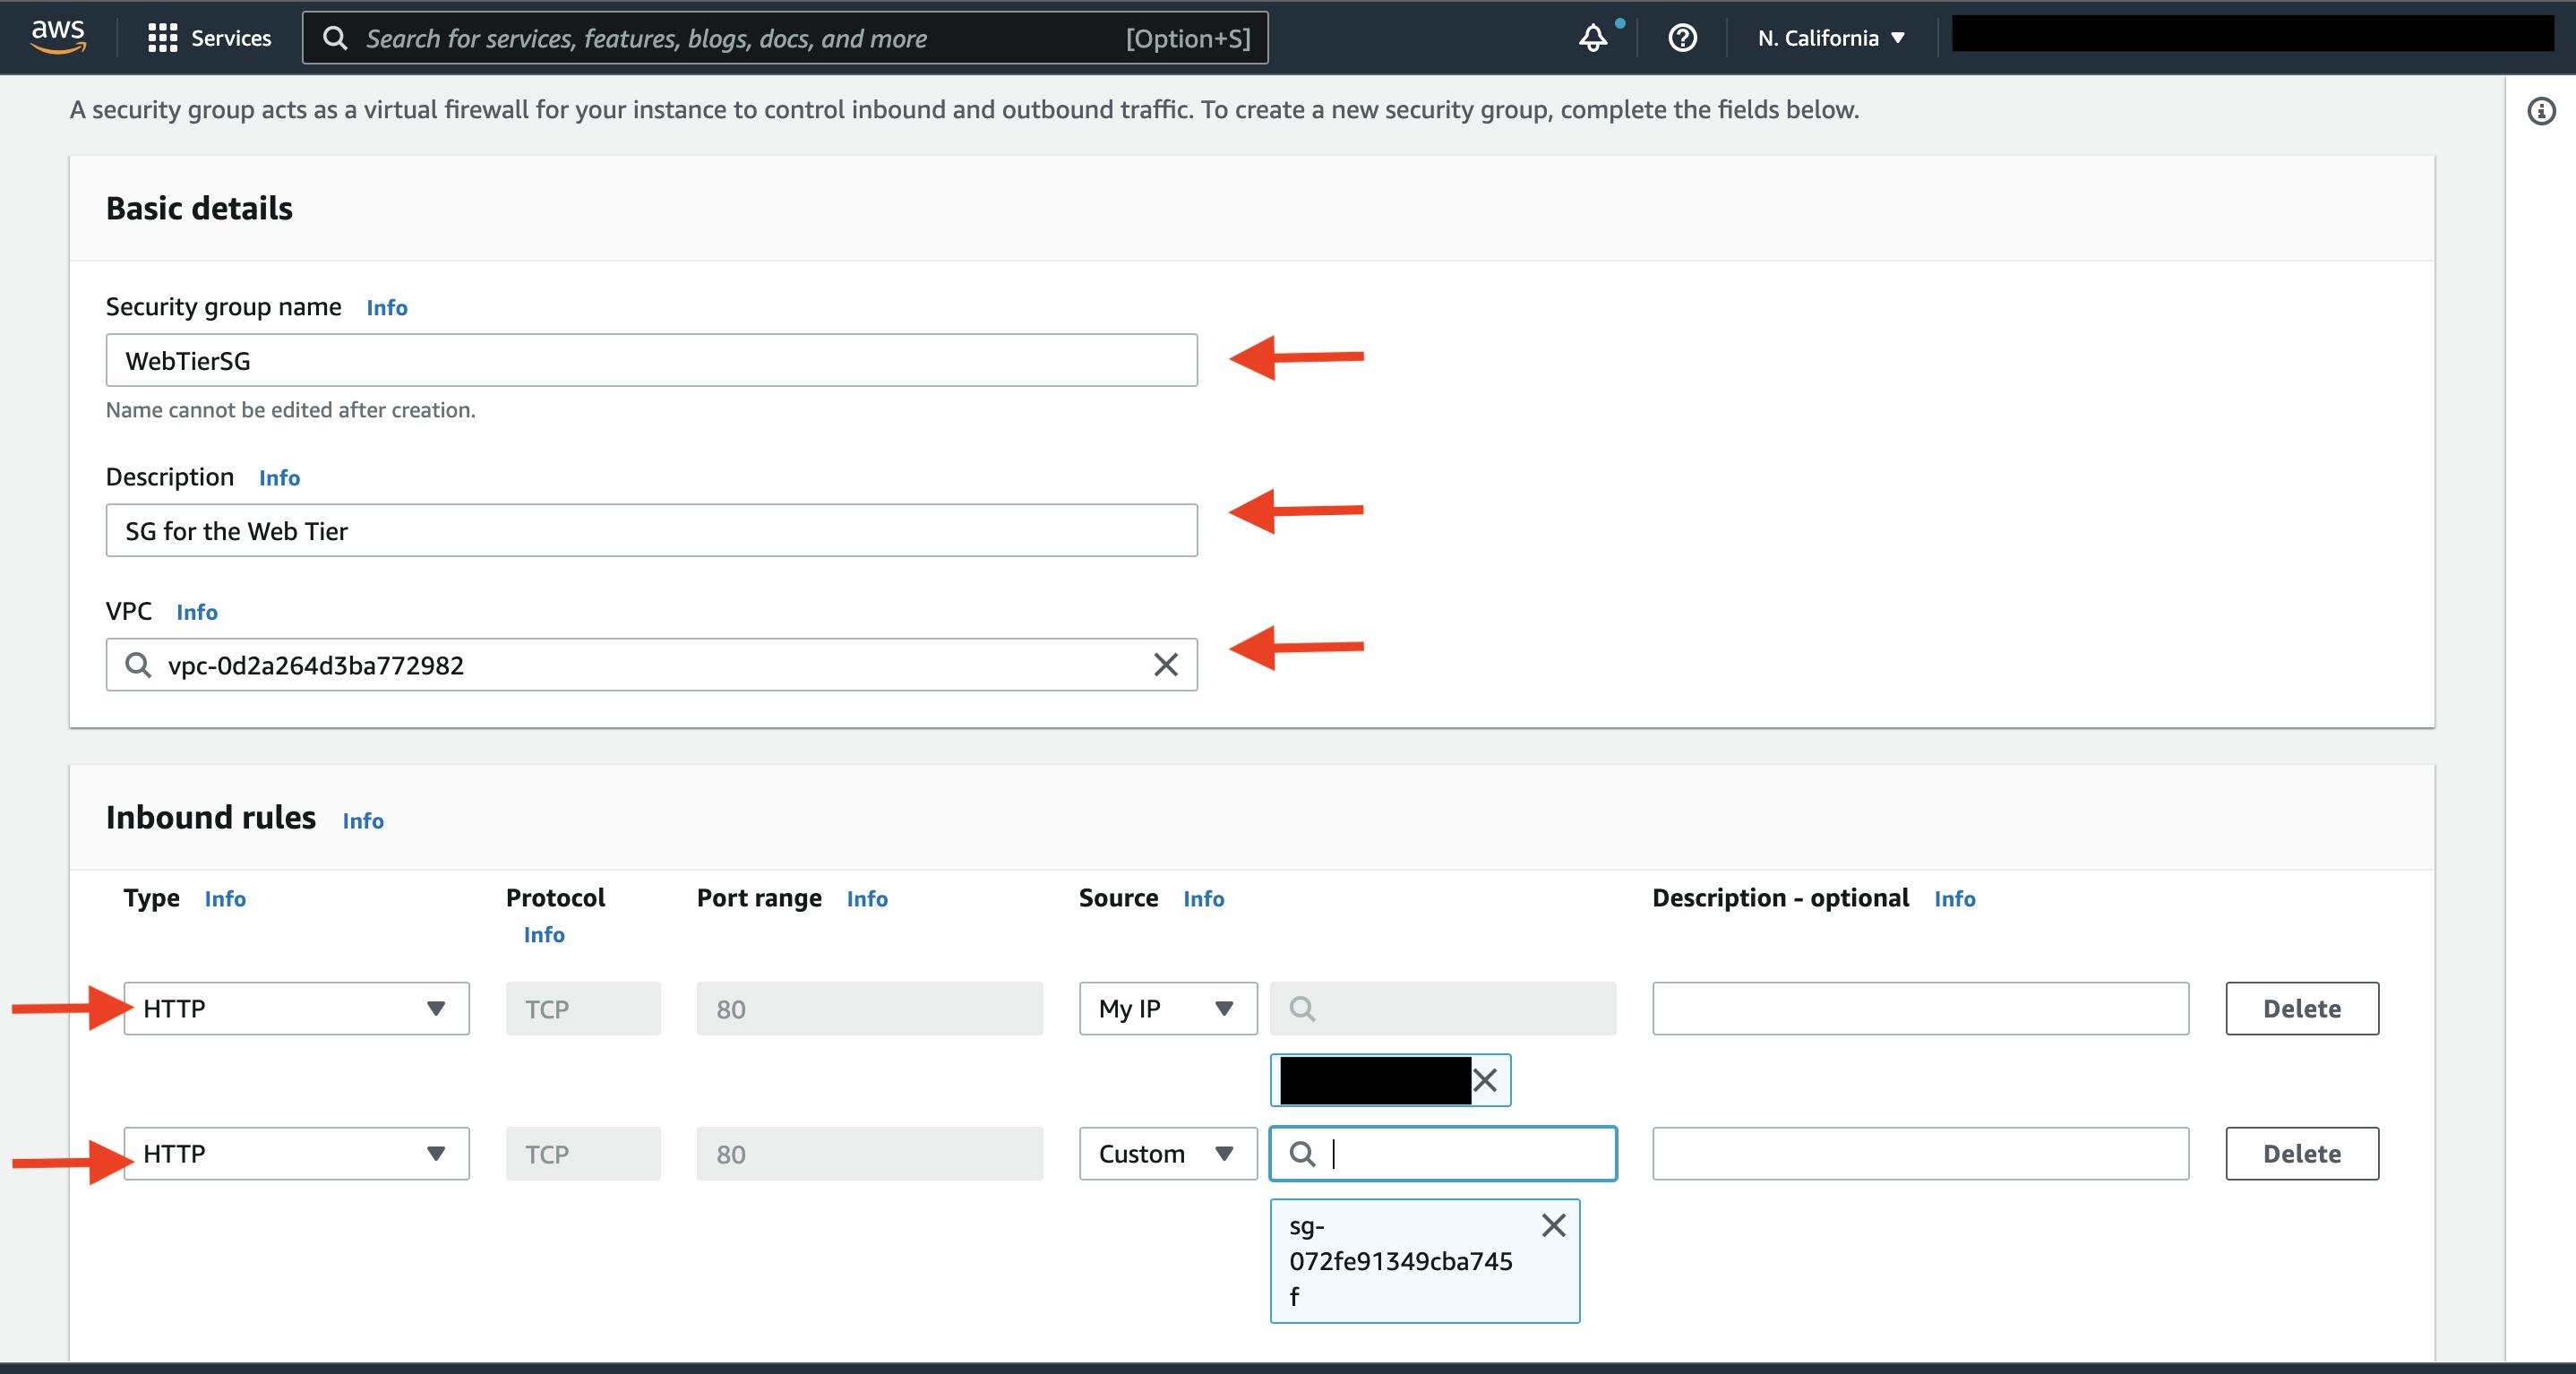
The second security group you’ll create is for the public instances in the web tier. After typing a name and description, add an inbound rule that allows HTTP type traffic from your internet facing load balancer security group you created in the previous step. This will allow traffic from your public facing load balancer to hit your instances. Then, add an additional rule that will allow HTTP type traffic for your IP. This will allow you to access your instance when we test.
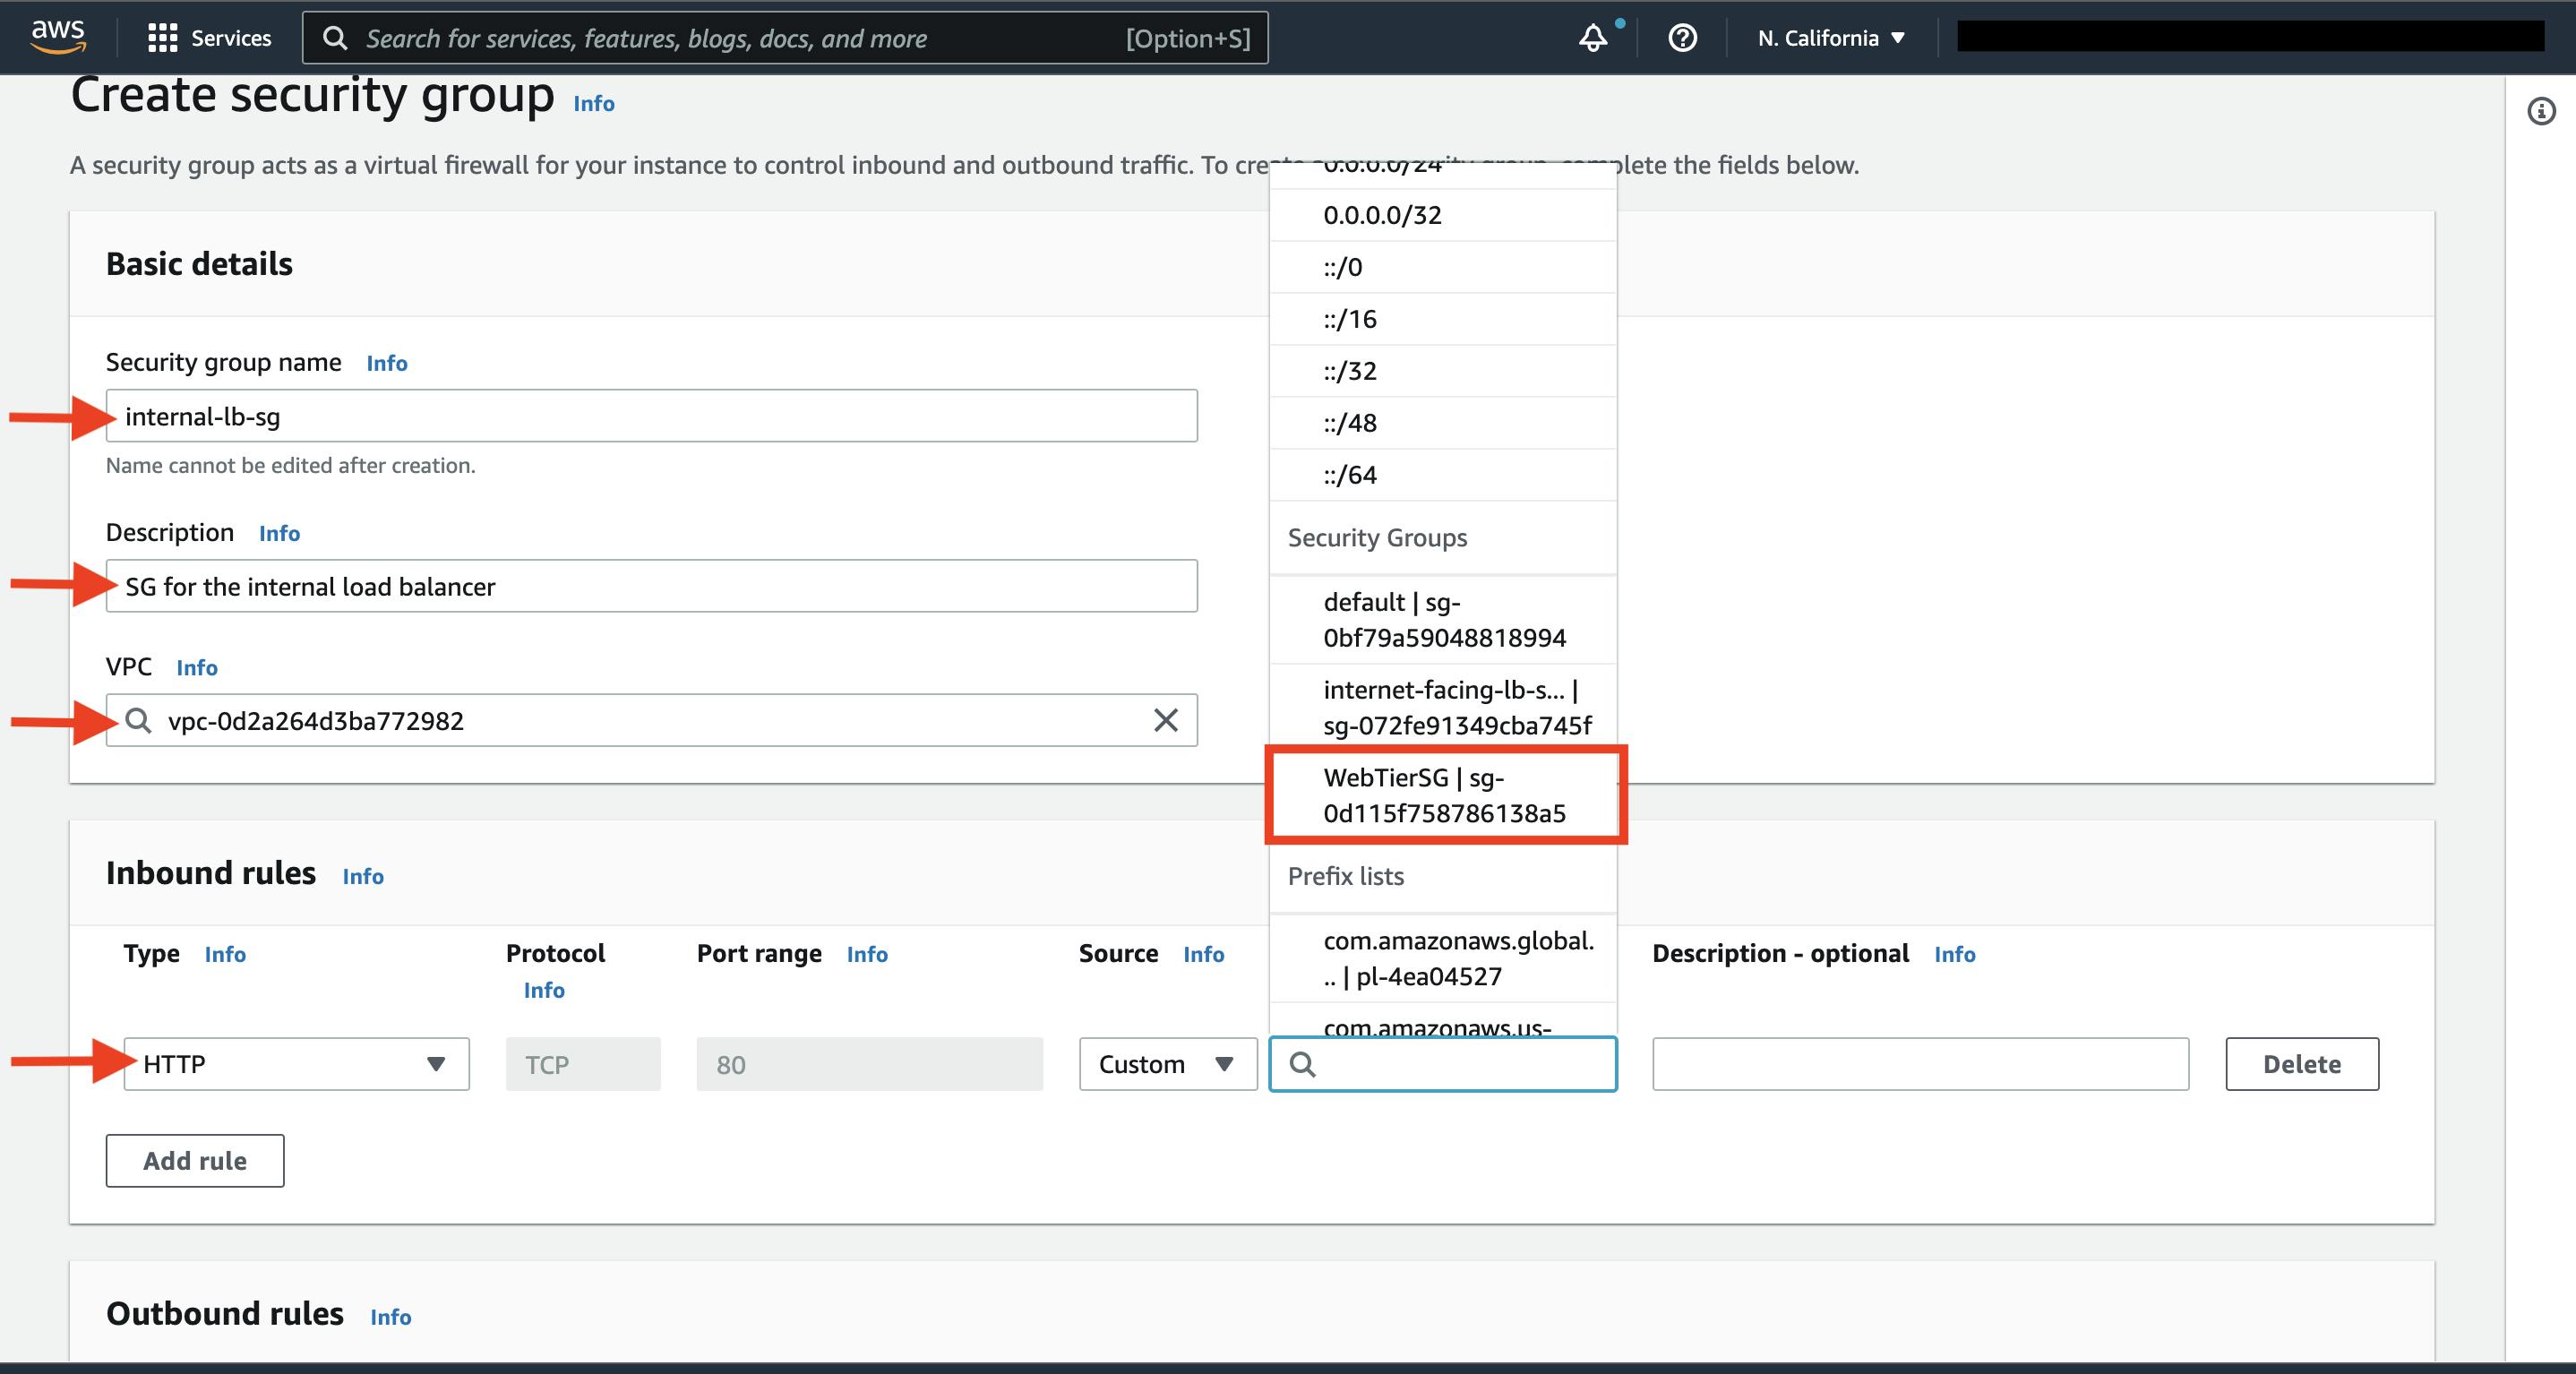
The third security group will be for our internal load balancer. Create this new security group and add an inbound rule that allows HTTP type traffic from your public instance security group. This will allow traffic from your web tier instances to hit your internal load balancer.
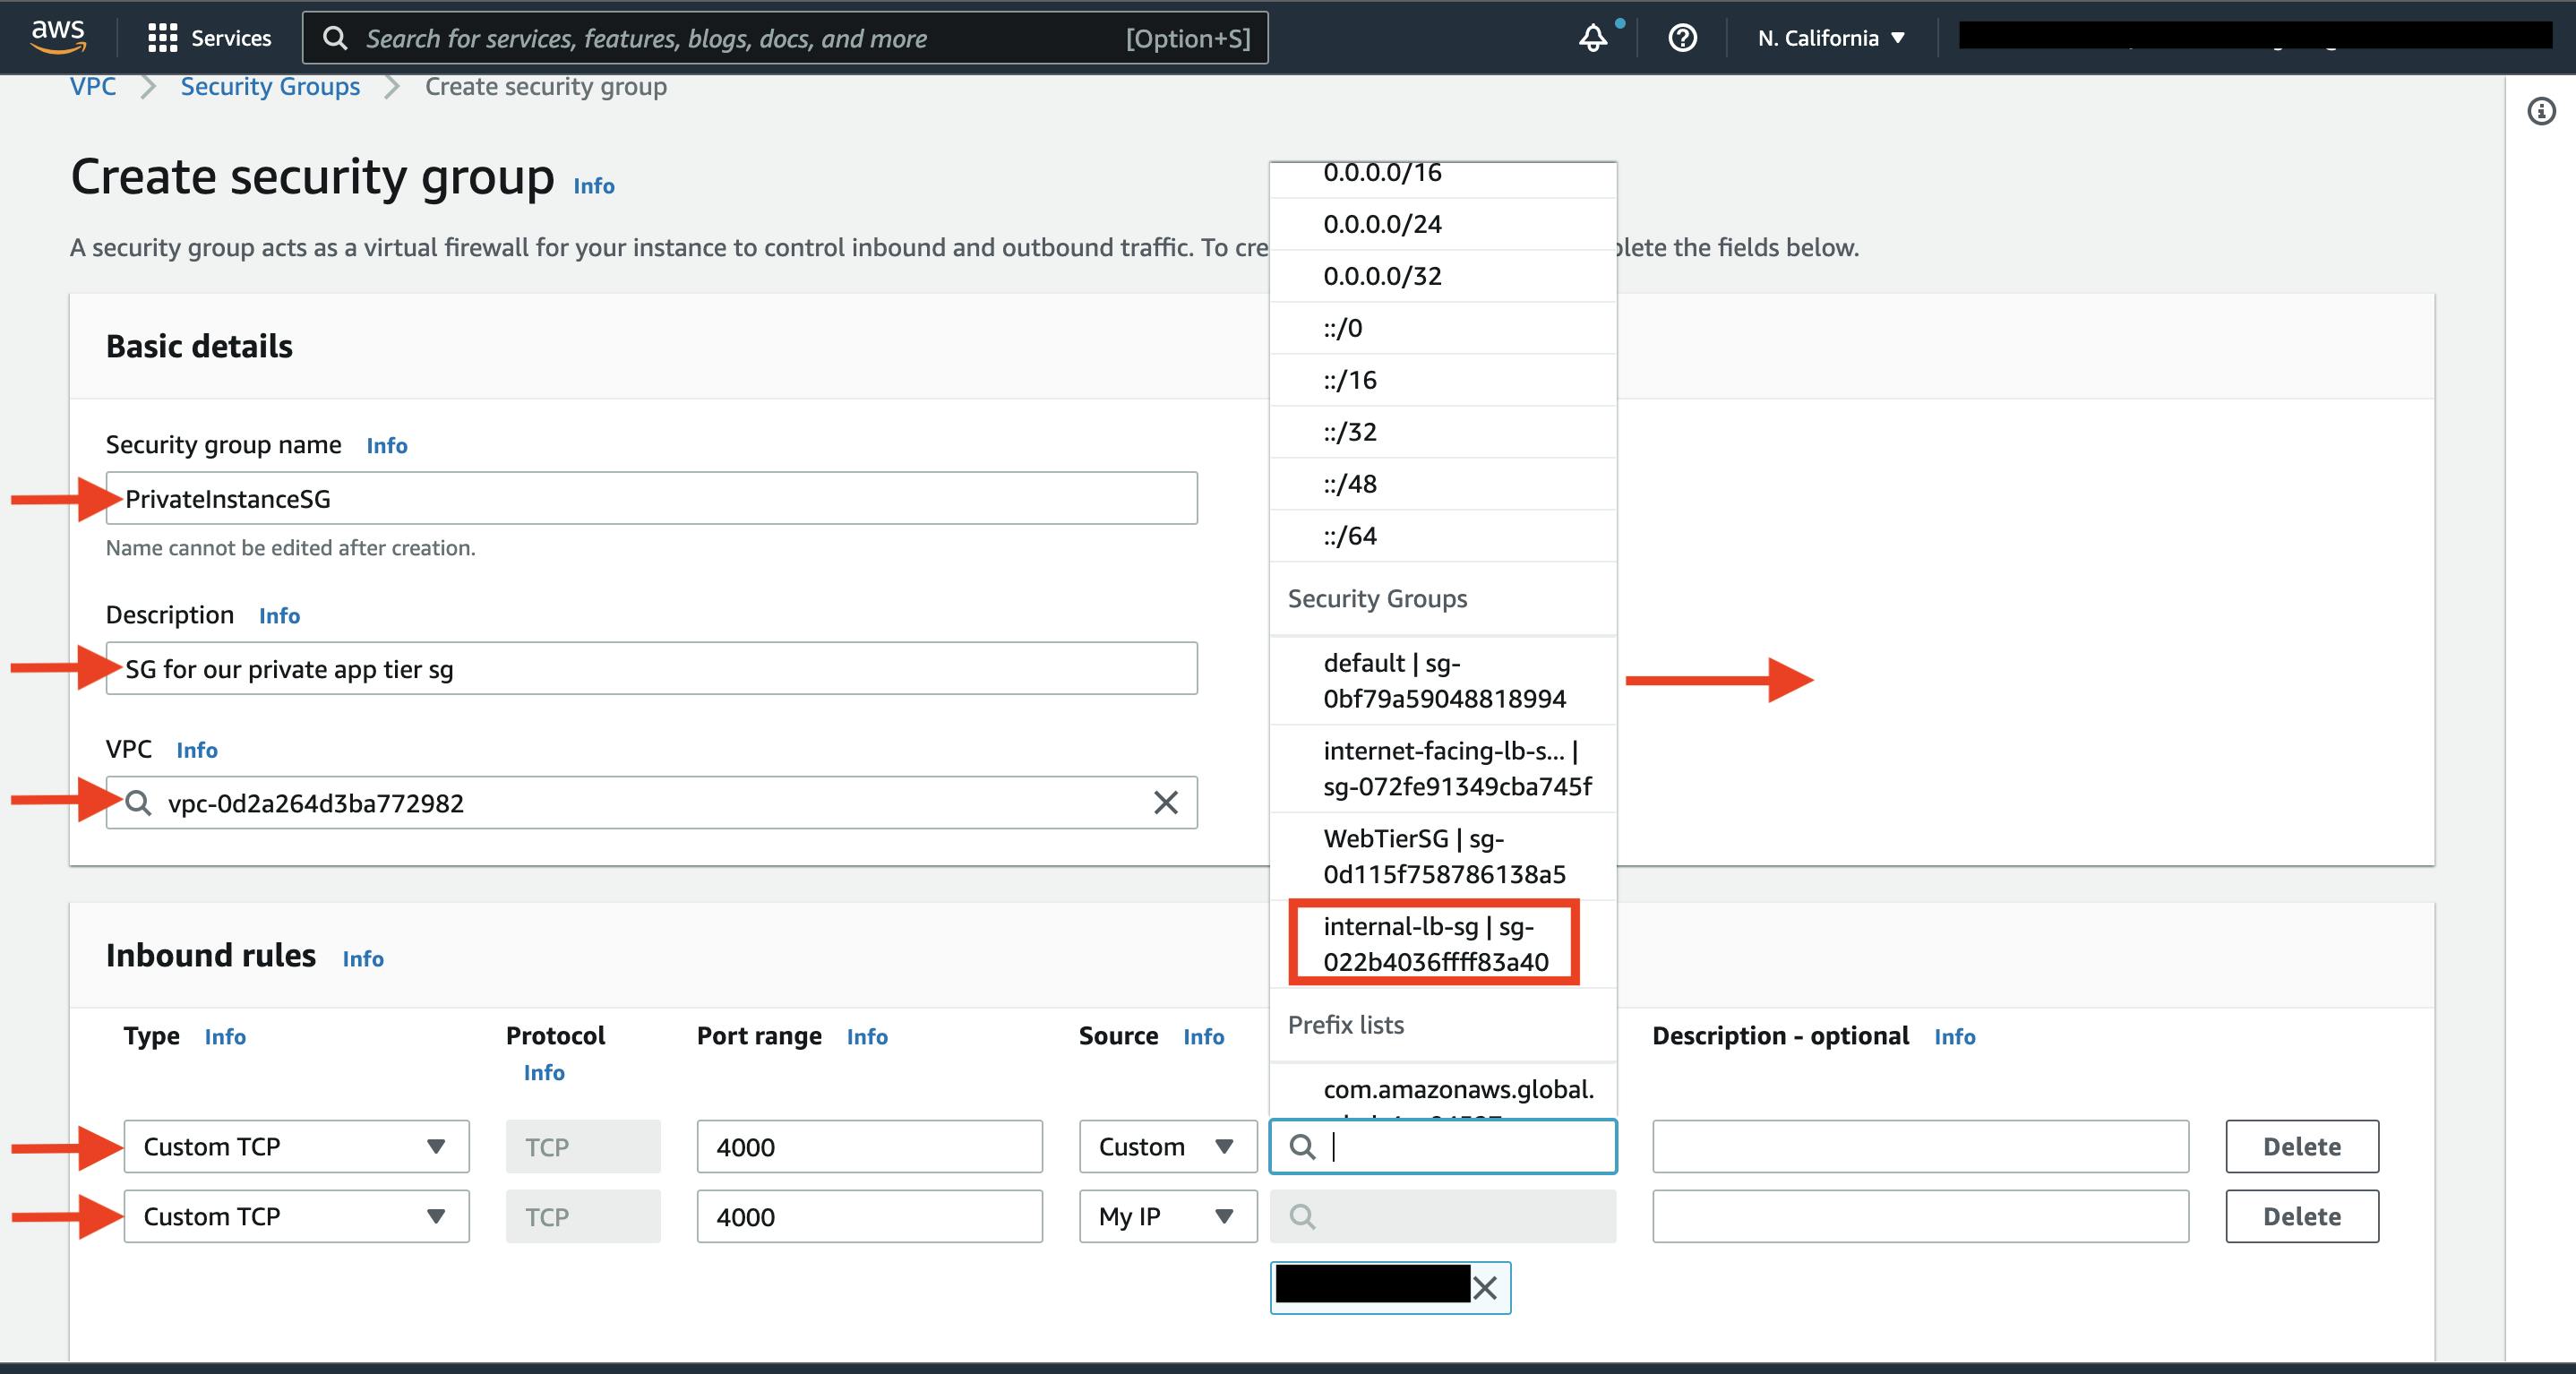
The fourth security group we’ll configure is for our private instances. After typing a name and description, add an inbound rule that will allow TCP type traffic on port 4000 from the internal load balancer security group you created in the previous step. This is the port our app tier application is running on and allows our internal load balancer to forward traffic on this port to our private instances. You should also add another route for port 4000 that allows your IP for testing.
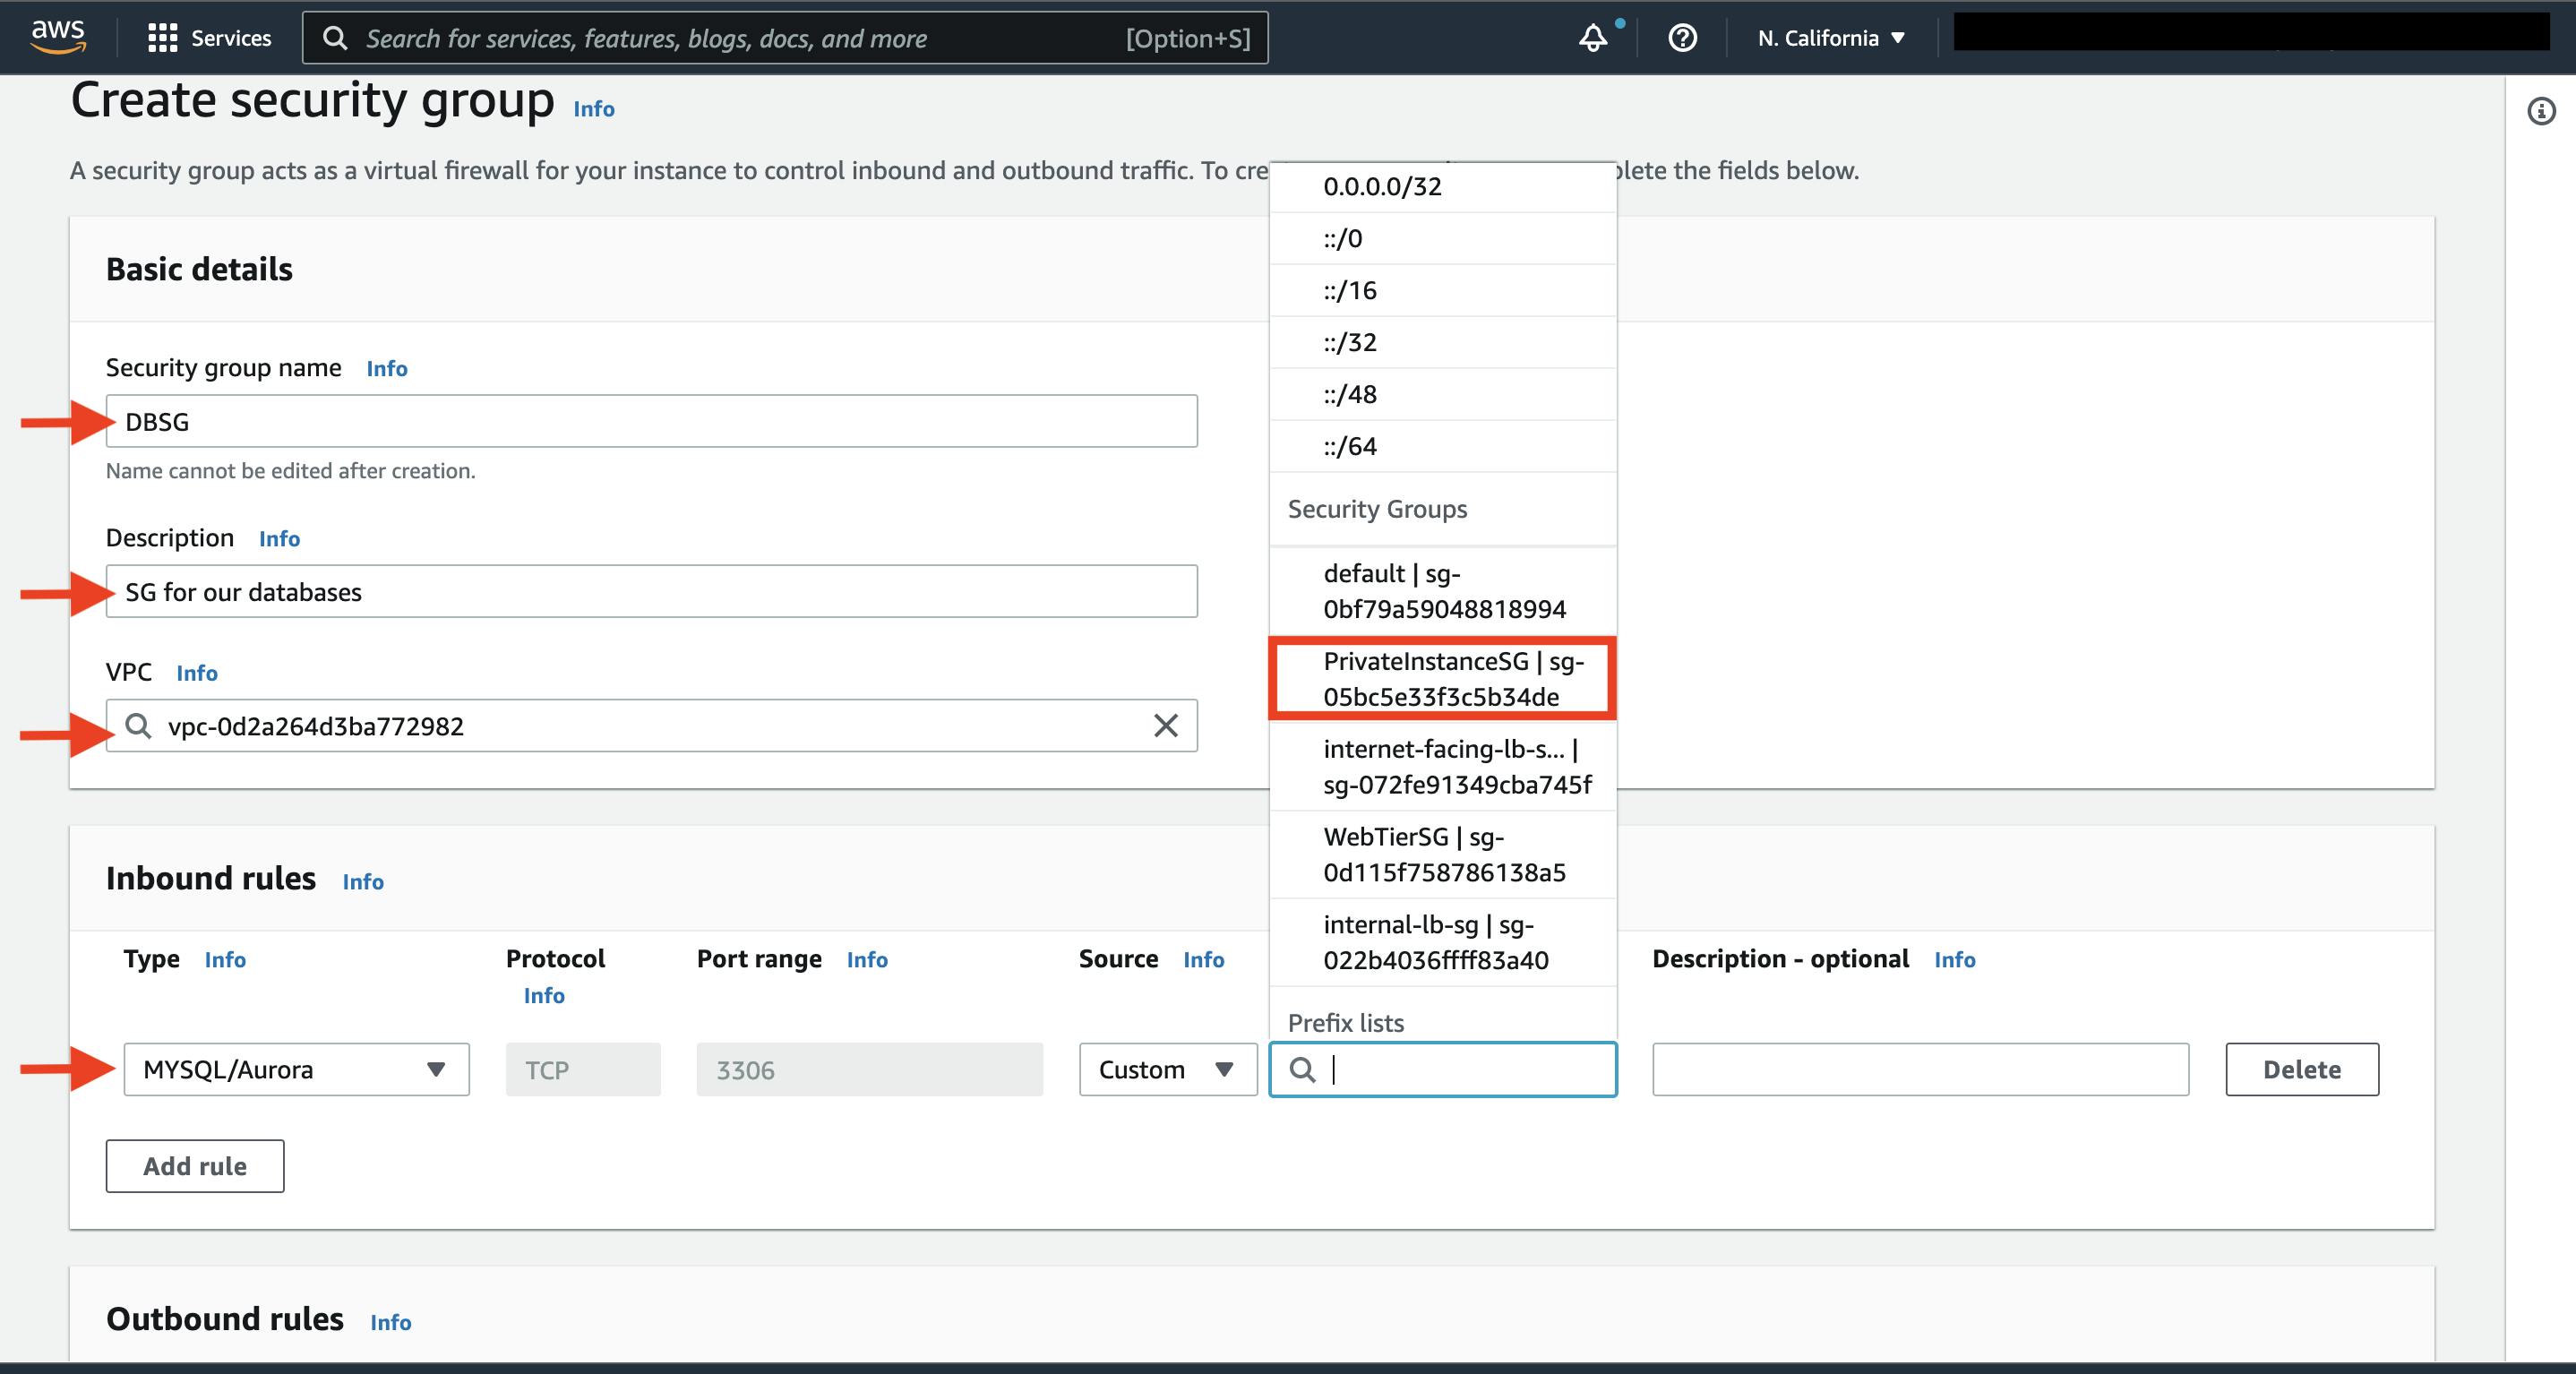
The fifth security group we’ll configure protects our private database instances. For this security group, add an inbound rule that will allow traffic from the private instance security group to the MYSQL/Aurora port (3306).
d
Subnet
- When adding subnets, make sure to add the subnets we created in each availability zone specificaly for our database layer. You may have to navigate back to the VPC dashboard and check to make sure you're selecting the correct subnet IDs.

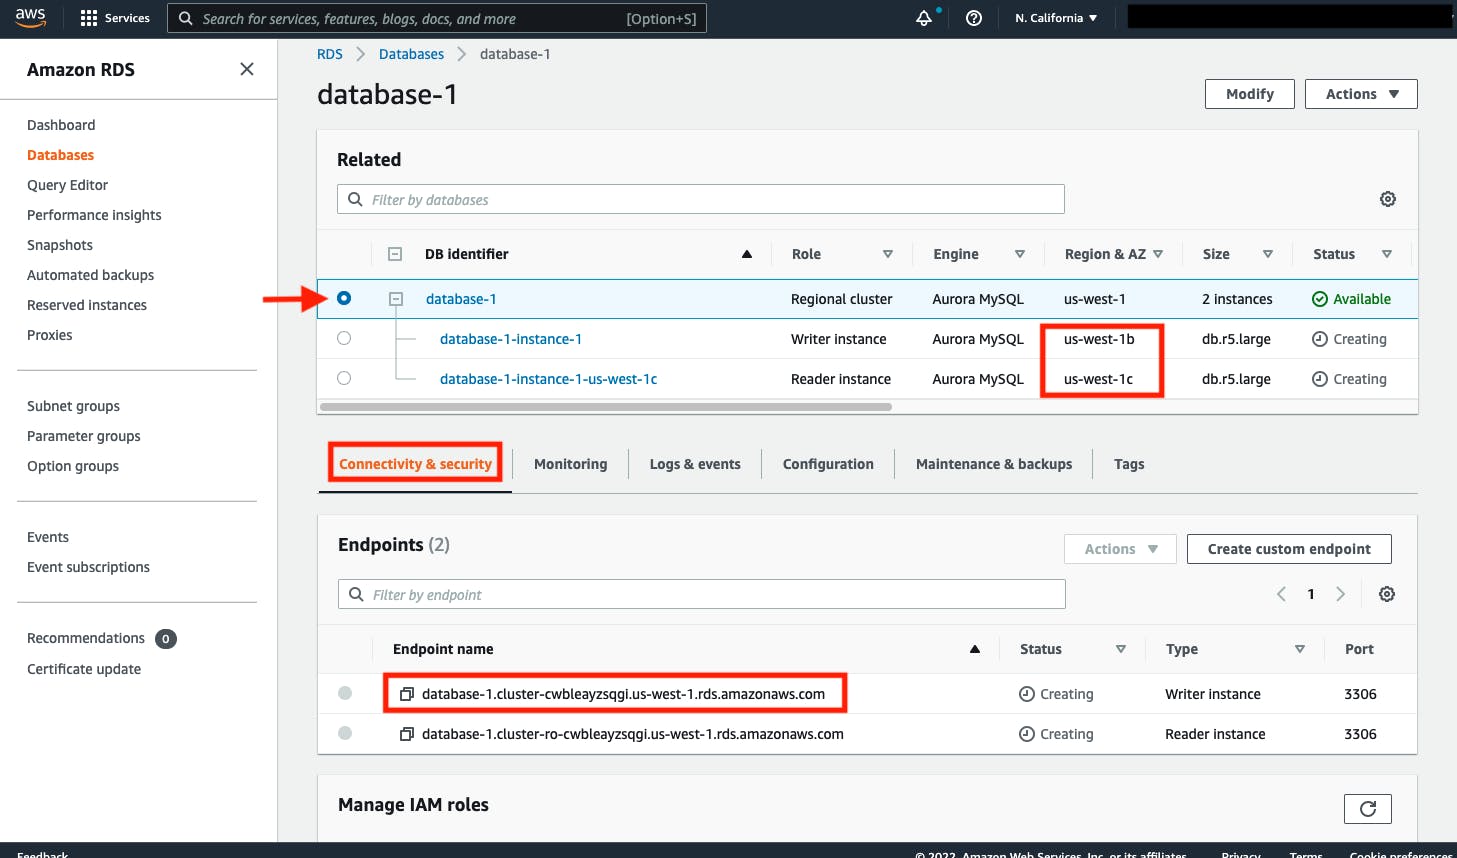
Database Deployment
under Availability and durability change the option to create an Aurora Replica or reader node in a different availability zone. Under Connectivity, set the VPC, choose the subnet group we created earlier, and select no for public access.
But the given GitHub link have only 2 tier application deployment can be successful